Complete Technical Paper Content — Car Hacking And Replay Attack Simulation Using Hackrf
Overview & System Context
Car Hacking And Replay Attack Simulation Using Hackrf: Comprehensive Web-Sourced Technical Investigation Exhaustive Research Dossier · Pure Web-Scraped Content: ~5971 Words · Real Software Screenshots: 3 1. Executive Overview & Technical Background The term remote keyless system (RKS), also called keyless entry or remote central locking , refers to a lock that uses an electronic remote control as a key which is activated by a handheld device or automatically by proximity.
As we all well know, today’s cars all have keys that can remotely unlock your car with the push of a button. No more pesky key insertions and twisting and manual locking/unlocking. Technology! RKS uses radio to send an unlock or lock signal to the car, to unlock it. Have you ever wondered what would happen if someone had the ability to record that signal and just replay it once you’ve left your car in the parking lot? We’ll be attacking an Opel Astra car, the only car I was close to at the time of writing.
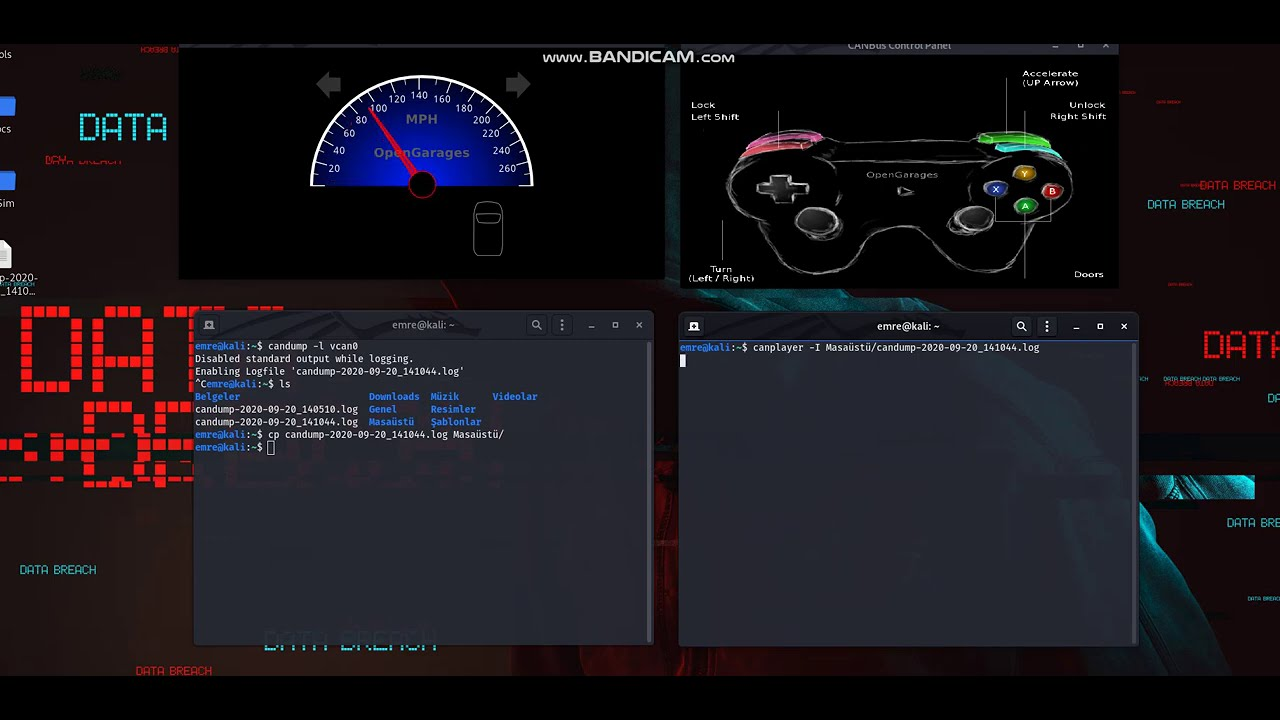
Figure 1: Car Hacking | Replay Attack - YouTube HackRF One is a SDR device which can transmit and receive radio signals in the range of 1 MHz up to 6 GHz. It was designed to enable test and development of modern and next generation radio technologies. It’s an open source hardware platform that can be used as a USB peripheral or programmed for stand-alone operation.
First and most important, frequency on which the key operates needs to be determined. For that, CubicSDR can be used, after connecting a HackRF to the computer running it. After opening up the CubicSDR software, the frequencies between 433 and 434 MHz can be scanned, which are the most likely frequency for it to be operating on, based on some quick online research. Even if there is no clue whatsoever what the frequency is, the search range can be broadened and zoomed into the first signal that corresponds to the timing of pressing the keys on the RF controller. The frequency found is around 433.9 MHz, and since each SDR receiver has its own margin of error (many software programs use frequency correction to deal with this), it’s safe to assume that it’s indeed using the standard 433.92 MHz frequency that most car keys operate on. It can also easily be seen that the HackRF has no trouble finding the signal the car key sends Now that the frequency the car key operates on is determined, it’s possible to intercept the signal using GNURadio Companion and record it to a file, so it can be replayed later.
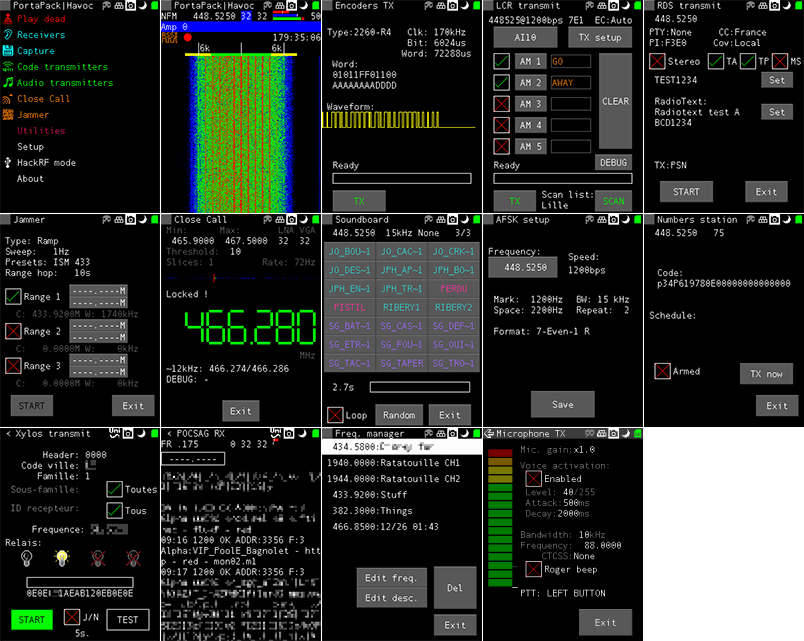
Figure 2: A Review of the HackRF PortaPack (With Havoc Firmware) As seen in the picture above, the flow graph is really simple. On the left side there is a variable block that determines the sample rate used, 10 million samples per second, and an osmocom Source block. Osmocom blocks are primarily developed for OsmoSDR hardware by Osmocom, but they in fact support a wide range of devices, including the HackRF through the libhackrf library, made by the creator of HackRF, Michael Ossmann. The blocks enable interaction with the HackRF device through the GNURadio software. This particular block, the Source block, enables users to tune in to the device with the settings they want and receive and manipulate the data it receives based on the settings they give it. On the right side there is a QT GUI Time Sink, which enables visualising the received data, and if necessary to make some adjustments to the settings of the source block based on the data. Last, there is the File Sink which streams the signal from the source directly to a file on the computer running GNURadio. Since the osmocom Source block is the most important part of the flowgraph here, each and every one of the settings on it will be analysed, explaining what they are used for. They will also be of use when describing the flowgraph used for replaying the attack.
Upon execution of the flowgraph, and pressing the unlock button on the car key, the waveform of the signal the key sends can be seen. After stopping the flowgraph, a file should be stored on the computer running GNURadio, containing the signal. Because of the high sample rate, the file can easily reach sizes up to 1GB for a few seconds of recording. After recording the signal, we’re ready to begin the replay attack phase. First, a flowgraph for replaying the signal has to be made, and the signal quality needs to be checked, to determine if it is good enough to be reproduced reliably.
The flowgraph for replaying the signal is also fairly simple, the difference is that this one is using an osmocom Sink block to replay the data through the HackRF, and a Throttle block, since the visualisation of the raw data with the QT Sink would be very CPU intensive. After trying to replay the captured signal, nothing happens. The attack doesn’t work. The reason why can be seen through the QT GUI Time Sink.
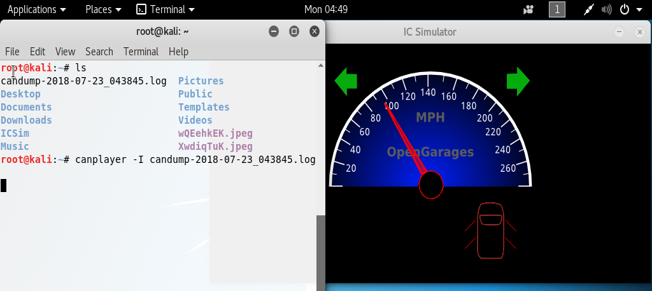
Figure 3: Car Hacking in 30 Minutes or Less | BrysonPayne.com It can easily be seen that the maximum and minimum amplitude reached is only approximately 0.35, which isn’t that great considering it can go up to 1 and down to -1. So, the signal needs to be amplified to at least be doubled somehow, to reach 0.7 amplitude or more, and GNURadio has just the block for that.
The block is called Multiply Constant, and it can be used it to multiply the captured signal by any given number. Since the goal is to at least double the signal amplitude, 2 can be used as the constant. Upon execution of the replay attack, the difference in the amplitude of the signal we’re sending to the car is immediately seen, and sure enough, the attack works. The car can now be locked or unlocked by executing the flowgraph given the file containing the saved signal.
I’ve previously covered getting your HackRF set up in Linux and getting the firmware updated. In that guide we installed the very easy to use CubicSDR application and were able to easily tune to various audio signals. Today we’re going to do something more interactive and actually use the transmitter. We’re going to unlock and lock my vehicle using the HackRF! Let’s get started.
The first place to start is by actually looking at your keychain/FOB. This will have a FCC ID that will give us all the information we need to capture and replay the lock/unlock codes. Here is what mine looks like for the 2006 Chrysler 300C we previously connected to in my ODBII wireless car diagnostic tool article : It’s very hard to read in the picture. If your key is very worn like mine the trick is to rotate it in the light. You will be able to read it when the light hits the etched text even when it’s worn like this.
This will take you to a list that can help you find the frequency information we are looking for. Mine looked like this: I selected the page for my key and it took me to a product site that had the information I was looking for. This will vary by product sites (try several if you’re having a hard time finding it). Now that we’ve located the frequency we need to be looking for we can begin using the HackRF to find the lock / unlock codes for the vehicle.
I will use CubicSDR to monitor and intercept these transmissions from my key. I have covered in a previous guide how to set up the HackRF and get CubicSDR so follow that first if you need to and you will have this application. Notice there’s really nothing to see here. Watch what happens though when I start pressing “Lock” or “Unlock”: It is interesting to listen to the signal as well. This surprised me at first as I had my headphones on but you can actually hear this signal! 2. System Architecture & Core Working Principles The HackRF has a really neat way to do replay attacks using the built-in utilities we installed during my HackRF Getting Started Guide . We can use the hackrf_transfer tool for this purpose.
Here is an example of how to perform a capture. You should put your frequency in the -f parameter (mine was 315 MHz which would be 315000000). Let’s save the file to the name “unlock”: The way you perform the capture is run this command and press the “Unlock” button. Now hit Ctrl+C to stop the capture in your command prompt window. This will leave you with a new file called “unlock”. This is our captured unlock command! Let’s test it now. Make sure your vehicle is locked first. The way to replay our captured file from earlier is like this: With any luck your car will immediately unlock (if the HackRF is close enough). I originally performed this replay from my desktop but it wasn’t close enough. I ended up using a laptop and then I was able to unlock it without trouble.
Now you can capture the other commands and simply change the -r parameter from “unlock” to “lock” as an example. You could also capture the panic button, opening the trunk and any other available actions. You’d end up with a bunch of files and you would replay that file based on which action you want to perform. Many newer cars have much more complicated entry systems that use “rolling codes”. It’s honestly similar to something like a two-factor authentication (2FA) code where you can’t use the same code every time. There are often programs (or techniques/tricks) out there to help you defeat these. For example recently all of Honda’s rolling keyless entry codes were defeated on vehicles of model year 2012 and newer.
Just keep in mind that if you have a newer vehicle especially it is almost certain to use modern “rolling codes” which makes the attacks more complicated (but not impossible). We’ll cover this more in the next section. There are also devices you can build specifically meant to defeat rolling codes in modern vehicles. I wanted to mention the RollJam for sure .
This is a device that contains two radios. One of them intercepts the code from the key fob essentially letting you “store” the code for later. Each time you press the button you end up getting a new “code” that you can use to execute commands on the vehicle normally (once per code). This works because the codes on many of the vehicles never expire. If you are more interested specifically in unlocking modern vehicles rather than replay attacks the RollJam is definitely one of the techniques you are going to want to investigate. It isn’t a specific device but it’s rather a technique of using two separate radios and is usually built yourself ( similar to a Pwnagotchi ). These are often made up of inexpensive devices like a Teensy. I would like to build one of these eventually here (or the modern evolution of it) and will definitely cover that when I do.
There is a lot of great work done on this specific problem. If you want a deep dive on bypassing rolling code systems there is an article (along with GitHub scripts and code) by a person identified as 0x5c4r3 here that I found excellent . They say they wrote it specifically because all of the blog posts were really outdated and for really old cars (sorry I didn’t help much with that using my ancient vehicle nor do I have a newer one). That is the article you are looking for if you feel the same way / are trying to defeat these.
This shows how easy it is to use the HackRF to essentially intercept a signal and save a copy of it. You can then replay that signal on the HackRF to execute replay attacks. It’s simple to capture things and repeat them. More advanced attacks are also available to circumvent replay protection and the HackRF is also widely acknowledged as one of the best software defined radios to perform those attacks with as well.
If your vehicle is too difficult to attack with a replay attack you should look around for other targets around the house. Older garage door opener systems are another system that is common to try a replay attack with using the HackRF. Any system that transmits signals as commands is a potential candidate. You may also investigate using a second radio for jamming and capture codes from your actual key fob to store for replay attacks (see RollJam and bypassing rolling codes section). The jamming radio keeps those codes from reaching the vehicle so they are never invalidated and you can use them for your own commands in the future (one time for every code you store).
Systems that rely on these types of signals are everywhere. Many of them have been there for decades and are seldom noticed or thought of at all (until they break). Think about what is in your home that uses RF or any type of wireless signal. Does it have a remote control? That could be an interesting system to inspect with the HackRF and try simple replay attacks and see what you can do.
The older the systems are the easier it will be as a rule of thumb (although it’s surprising how many brand new devices still have no protection against replay attacks). The process for a replay attack is exactly the same on any of these devices. Capture the signal and then replay it with the HackRF. It doesn’t take very long to try it on any given system either. The garage door opening system is on my to-do list (and a few other wireless/RF systems around the house) and I’ll definitely write about it on the blog if they yield any interesting results. My garage door system is only a couple of years old so it will be interesting to see what kind of replay protection it has on it.
This is a very simple but very powerful method that works well with things that have simple commands like “Open”, “Close” or “Lock”. It was also interesting to actually hear the signal over my headphones! I cannot recommend 0x5c4r3’s article enough if you are trying to find information about rolling codes on newer vehicles/devices For the best upgrade you can do with your HackRF see my Upgrading HackRF One to PortaPack H2 guide! My original HackRF Software Defined Radio Guide for Linux will give you all the utilities I used in this article to perform the replay attack Speaking of interfacing with your vehicle also see my Read and Reset Car Codes – Wireless ODBII Diagnostic Tool guide The Pwnagotchi tool is an interesting tool made with a Raspberry Pi Zero that automatically grabs handshakes from WiFi networks (and can even crack them) Hi sir i need to buy hack RF z relay attack car device how much cost of it pls reply me Hi James thanks for this. this has been really healpful to me . I’m currently writing my college project on this. can you tell me about any sources i can cite.
Welcome! So this is a bit trickier of a question to answer than I thought it would be. The main reason is that some of the best material written on this is written by hackers that are straight up writing it anonymously and won’t even give their real name. 3. Software Implementation, Frameworks & Protocols I linked to a lot of these in the article but I’d imagine that for citing in a college paper having anonymous sources that won’t identify themselves might be a sticking point unless you have some very visionary professors that would accept citations from someone using a pseudonym basically. Most professors (at least when I was in college) definitely wouldn’t have accepted this but I graduated in 2010 so it has been a while. They would have said that it has no credibility if someone won’t even put their real name on the work (even if this was a popular and well-recognized hacker pseudonym with existing published work).
This one from RTL-SDL would probably be a good source . That’s at least a real company and publication outlet that would be appropriate to cite. They also link to a bunch of other sources in the article including GitHub with projects and code. I think this is probably the type of sourcing you’d want to use for what you’re saying. Linking to projects / GitHub / code is absolutely a high quality citation in contrast to citing anonymous hacker articles online for sure.
A practical wireless security research project analyzing the susceptibility of car key fob systems to RF replay attacks using a HackRF One with PortaPack H2+ . The project focuses on understanding how fixed-code wireless systems can be exposed to signal capture and replay attacks, demonstrating the security implications of static RF authentication mechanisms and the importance of stronger wireless security controls.
Modern vehicles rely heavily on wireless key fobs for functions such as locking and unlocking doors. When a key fob uses a static or fixed RF signal , the transmitted signal may be susceptible to interception and subsequent replay. This project investigated that security weakness using Software-Defined Radio (SDR) hardware. The assessment demonstrated the security weakness associated with static/fixed-code RF authentication .
When the same RF authentication signal is reused, an intercepted transmission may potentially be replayed without requiring the original key fob to transmit the signal again. This illustrates an important limitation of static wireless authentication mechanisms. The underlying issue is that the authentication mechanism does not sufficiently distinguish between an original transmission and a previously captured transmission.
A major defensive approach against replay attacks is the use of rolling-code authentication . Instead of transmitting the same authentication value repeatedly, rolling-code systems use changing authentication data between successive transmissions. Additional defensive considerations include secure cryptographic authentication, protection against signal manipulation, and careful implementation of synchronization between the vehicle and key fob.
This project was conducted strictly for educational, security research, and authorized testing purposes . The techniques and concepts documented in this repository should only be applied to systems, devices, and vehicles for which explicit authorization has been obtained. Do not capture, replay, or interfere with wireless signals belonging to vehicles or devices that you do not own or have permission to test.
This project is intended for educational and security research purposes. See the repository license for applicable terms. Conducted a security assessment of car key fob systems and identified a replay attack vulnerability using HackRF with PortaPack H2+. The project demonstrated how unencrypted signals transmitted by key fobs can be intercepted and replayed, allowing unauthorized access to vehicles.
Following is an extract of the paper written. It is aimed as a basic overview for those getting started in RF and does not go into much detail. If any RF experts spot errors, please let me know! A remote keyless entry system simply refers to any electronic lock that functions without the use of a mechanical key. Comm only, this comes in the form of a key fob, with buttons that communicate using radio frequency (RF) signals with a receiver to perform a certain action, such as locking or unlocking a vehicle.
A one-way RKE requires a manual button press to perform an action. The vehicle receives the signal and confirms that it is a valid code, then performs the required action. With a rolling code system, a cryptographically secure pseudorandom number generator (PRNG), installed in the vehicle and the key fob, is used to periodically change the required code after a keypress, usually with a buffer to account for accidental out-of-range button presses. One-way RKEs are the simplest and most common form of keyless entry, and its security will be the focus of this report (van de Moosdijk & Visser, 2009, pp. 8-9).
Two-way RKEs require a 'response' from the key fob given a certain 'challenge' from the vehicle (Alrabady & Mahmud, 2005, p. 2). Passive RKEs (abbr. PKEs) automatically unlock within a certain radius or upon the user touching a door handle; they are usually paired with a push-button ignition switch (van de Moosdijk & Visser, 2009, p. 9).
Several new technologies have made RF security testing simpler and more affordable for hobbyists and researchers, the mos t important development being the software-defined radio. A software-defined radio is a radio system where components traditionally implemented in hardware, such as filters and demodulators, are instead implemented in software (Dillinger, Madani, & Alonistioti, 2003). The setup typically involves an RF front end and an analogue-to-digital converter, connected to a computer via USB. The computer performs the complex tasks, such as demodulation, which refers to extracting the original signal from a carrier wave. Recently, it was found that a common USB TV tuner dongle, the RTL-SDR (refer Figure 2), could be made to send raw I/Q data to a computer (in-phase and quadrature, referring to the real and imaginary components of an RF signal) (Whyte, 2013). Hence, it became affordable for the average hobbyist to have a wide-band spectrum analyser. At the time of writing, such a dongle could be obtained for less than 10 USD (eBay Inc., 2017).
In addition, advances in computing hardware and software have allowed for complex signal analysis using graphical flow graph software, such as GNURadio, capable of manipulating, decoding and encoding data for use with software defined radios (The GNU Radio Foundation, Inc., 2017). Another important development is the popular Raspberry Pi single board computer, which for 35 USD offers a full Linux operating system running on a 900Mhz quad-core processor, 4 USB ports, display outputs and 40 general purpose input-output (GPIO) pins, which provides an easy-to-use, affordable testing base for the experimental jam and replay attack outlined below (Raspberry Pi Foundation, 2015).
4. Practical Deployment, Analysis & Case Studies The attack that was carried out against the one-way RKE is a jam and replay attack. A high level overview and illustration of this attack is shown in Figure 3. The attacker utilises a device with full-duplex RF capabilities (simultaneous transmit and receive) to produce a jamming signal, in order to prevent the car from receiving the valid code from the key fob. This is possible as RKEs are often designed with a receive band that is wider than the bandwidth of the key fob signal (refer Figure 3, right). The device simultaneously intercepts the rolling code by using a tighter receive band, and stores it for later use. When the user presses the key fob again, the device captures the second code, and transmits the first code, so that the user’s required action is performed (lock or unlock) (Kamkar, 2015). This results in the attacker possessing the next valid rolling code, providing them with access to the vehicle. The process can be repeated indefinitely by placing the device in the vicinity of the car. Note that if the user unlocks the car using the mechanical key after the first try, the second code capture is not required, and the first code can be used to unlock the vehicle.
The first step in reverse engineering the key fob was to determine its operating frequency. The key fob case was inspected, however there were no visible frequencies or radio IDs listed that offered clues to the operating frequency. Hence, the RTL-SDR was utilised. Common unlicensed frequencies in the International Telecommunication Union Region 3, containing Australia, were tuned to and the key fob repeatedly pressed until a signal became visible on the fast Fourier transform (FFT) plot, which displays a live view of the RF spectrum (refer Figure 4, top half). The horizontal axis represents frequency in megahertz and the vertical axis the amplitude in decibels relative to full scale (dBFS). A waterfall plot is shown in the bottom half, which plots the FFT over time, with the colours representing signal amplitude (blue to red, in increasing signal strength).
Figure 4: FFT plot of frequency versus signal strength showing key fob signal at 433.911MHz As seen in Figure 4, there are two peaks at 433.878MHz and 433.957MHz, with the entire signal centred at 433.911MHz. Thus, it was deduced that the key fob used a modulation scheme known as 2-FSK (frequency shift keying), where two discrete frequencies are used to transfer digital data. However, the FFT plot does not provide information regarding how the data is actually encoded.
To further analyse the signal, a Debian setup was utilised, and the gqrx SDR receiver software used to record the key fob I/Q data. The data was passed to inspectrum, an open-source waveform analysis tool (Software in the Public Interest, Inc., 2017; Csete, 2016; Walters, 2017). A screenshot of the beginning of the signal is shown in Figure 5. Figure 5: Inspectrum signal analyser displaying preamble, sync-word and rolling code data The vertical axis represents the frequency offset from the centre frequency (433.911MHz) in kHz, whilst the horizontal axis is time in seconds. As established, the signal visibly oscillates between two frequencies. The consistent, repetitive section of the signal on the left hand side of Figure 5 is the preamble, which is used to synchronise the clock of the receiver to correctly decode the transmitter’s packets. Following the preamble is a four-bit sync-word, which in this case is 1100110011001100, or 0xCCCC in hexadecimal. This sync-word is used to avoid clashes with other devices operating in that band. Following the sync-word is the actual rolling code signal, which is repeated twice, divided by a gap, seen in the far right of Figure 5. At first guess, the signal appears to be Manchester encoded, which means every bit (zero or one) is either encoded as high then low, or low then high, for the same period of time (refer Figure 6).
Initially, the signal was decoded by manually capturing I/Q data from the RTL-SDR and using the open-source waveconverter project to demodulate the signal, and then decode it based on pulse lengths (technical details are omitted) (Clark, 2017). However, this process was very tedious and not easily scalable. The system had to be simplified to use dedicated hardware instead of a general purpose SDR.
To simplify the system, a Yard Stick One USB RF transceiver was used, that is capable of receiving and transmitting in various industrial, scientific and medical (ISM) unlicensed bands, including 433MHz, with wide support for modulations such as FSK, ASK (amplitude-shift keying) and OOK (on-off keying). The device was controlled using an interactive Python shell, which allows commands such as d.setMdmFreq(433900000) to be set, in this case setting the modem frequency to 433.9MHz. Further settings such as the modem modulation, frequency deviation, data rate (calculated using inspectrum), channel bandwidth, and packet sync mode were configured to match the key fob’s characteristics.
Upon running the Python script and pressing the key fob, data was consistently received, and there were slight deviations in each packet, confirming that the key fob utilised rolling code. I then wrote another function to transmit the signal, by converting the hexadecimal code to the correct BitArray format, and using the d.rfXmit() function. As expected, this unlocked the test automobile when run.
To create the jamming signal, the open-source rpitx software was utilised, which is capable of transmitting RF signals via the Raspberry Pi’s GPIO pins. Specifically, the variable-frequency oscillator (VFO) mode was used, as it offers “precise frequency resolution” (Okcestbon, 2016). A carrier signal was transmitted at 433.850MHz, slightly below the operating frequency of the key fob, however within the automobile’s receive bandwidth. sudo ./rpitx –m VFO –f 433850 The Python replay program was run simultaneously with rpitx, and resulted in the car not locking or unlocking. However, as expected, the signal was captured by the Yard Stick One, and could be replayed at any time to unlock the car. In the interest of responsible disclosure, photographic evidence of the device unlocking the vehicle will not be released as this could compromise the security of many vehicles still in use.
At this point, the program was ported to a Raspberry Pi single-board computer as it is more portable and affordable compared to a dedicated laptop. A power bank was used to power the Raspberry Pi, and a long-range Wi-Fi dongle allowed communication via secure shell (SSH) from the laptop for initial configuration. An image of the final Raspberry Pi jam and replay setup is shown in Figure 7.
Figure 7: Photograph of final Raspberry Pi jam & replay setup showing connections to Wi-Fi, power and RF dongle The basic techniques applied here can be applied to more complex two-way or passive RKEs, using similar hardware. As an example, in a passive keyless entry system, the vehicle emits a low-frequency (LF) signal upon user interaction, such as touching the door handle, to alert all key fobs in the vicinity. The information transmitted via the LF signal is decoded by the key fob, which responds with a valid security code that is validated by the vehicle (Alrabady & Mahmud, 2005).
A PKE system can be theoretically compromised by a jam and replay attack, however the algorithm for the “response” code given the “challenge” from the vehicle must be reverse-engineered. An even simpler ‘relay’ attack requires an attacker to stand near the vehicle and amplify the LF signals, then transmit this to another attacker who is within close range of the owner’s key fob. The valid response from the key fob can then be transmitted back to the first attacker to unlock the vehicle (Francillon, Danev, & Capkun, 2010).
Attempt at RollJam, jam and replay keyless entry systems. Thank you to Samy Kamkar who first provided me with the inspiration to perform software defined radio research, view his more polished RollJam device here . Uses GNURadio to record IQ data from an RTL-SDR then decodes with a custom protocol made on wave-converter and parses the output to return the hex data.
Latest version utilises a Yard Stick One RF Transceiver with RFCat firmware approx $100USD. Thanks to RyscCorp for sponsoring my purchase. Will try to transfer register settings when testing is complete to a cheaper CC1101 chip/$1 433MHz chip and Arduino (about 50% done).
Further documentation will be uploaded in a few months time soon, including a paper on implications and recommendations for manufacturers, end-users and third parties. Attach an antenna to pin 12 of the GPIO header. Note that output is unfiltered and creates harmonics, probably illegal without licence. sudo ./rpitx -m VFO -f [FREQ IN HZ] Over on her website, Charlie Gerard has uploaded a page showing how she was able to perform a replay attack on a car's wireless entry system using a HackRF and a JavaScript browser app she wrote.
Previously, Charlie had already written a JavaScript browser app for ADS-B tracking with an RTL-SDR. To achieve this she used the WebUSB API, which allows USB devices to connect to JavaScript apps in a web browser. Having recently purchased a HackRF she wanted to see if something similar was possible with the HackRF. In her post, Charlie shows and explains the JavaScript code required to connect to the HackRF from a Chrome browser, and how settings like gain, frequency and sample rate can be adjusted. She then shows how to use the Canvas API to visualize the received data. Finally, she shows how to use the File System Web API to record data, and ultimately retransmit the recorded data with the HackRF.
5. Performance Evaluation & Extended Technical Observations The replay attack itself is based on the rolljam idea . She uses two HackRF's, with one sitting closer to the car's receiver and jamming it, and another recording the car's keyfob. This prevents the car from incrementing the keyfob's rolling code, allowing it to be recorded and used again at a later time.
A hands-on cybersecurity lesson plan introducing CAN Bus architecture, packet decoding, and simulated replay attacks for automotive security students. In 2015, security researchers Charlie Miller and Chris Valasek sat on a couch miles away from a highway. Using only their laptops, they connected remotely to a Jeep Cherokee driving at 70 mph. They bypassed the infotainment system, hopped onto the vehicle's internal network, and proceeded to turn the air conditioning to full blast, blast hip-hop from the radio, activate the windshield wipers, and eventually, kill the transmission in the middle of traffic.
How did they do this? They exploited the fundamental nervous system of the modern vehicle: the CAN Bus . Modern cars are not just mechanical machines; they are localized networks of up to 100 mini-computers called Electronic Control Units (ECUs) . Today, we are going to learn how to speak their language, intercept their messages, and understand how to secure them. The CAN Bus protocol was designed in 1983 by Bosch. At the time, cars were closed systems with no cellular connections, no Bluetooth, and no Wi-Fi. It was designed to be fast, cheap, and highly reliable. Because of this, it has three massive security flaws: Let's work together to isolate a specific action from a stream of network noise. Imagine you are sniffing a car's network while the driver is pressing the volume buttons on the steering wheel. We want to find which CAN ID controls the volume, and what the exact "Volume Up" payload is.
Look at the captured packets below. What patterns do you notice changing when actions occur? Analyze this raw, captured packet stream of a car while the driver uses the key fob to lock/unlock the driver's door. Your goal is to write down the exact command payload that a hacker would broadcast onto the OBD-II port to unlock the vehicle door . Q1: Why doesn't the target ECU block a command from an attacker's computer plugged into the OBD-II port? Because the CAN bus protocol lacks authentication . It treats every message as trusted and valid, regardless of its source.
Q2: If an ID 0x005 and an ID 0x1E5 try to send a packet at the exact same millisecond, which packet goes first? ID 0x005 wins. On a CAN bus, lower numerical Arbitration IDs have higher priority over the bus and preempt other traffic. Draft a 1-page "Threat Intelligence Report" or record a 3-minute voice memo answering the following questions for a car manufacturer: If hexadecimal math is hard to read: Think of hexadecimal values as a scale of 0 to 255 in standard numbers.
00 means completely off (0%). FF means completely on (100%). 7F is roughly half (50%). Python automation challenge: Use the python-can library to write an automated script that scans IDs 0x000 to 0x7FF , fuzzing each with variable payloads to find undocumented diagnostic commands (UDS - Unified Diagnostic Services). Master trending TikTok dances with this easy-to-follow, step-by-step guide! Learn how to choose a dance, break down move...
Learn fundamental cheerleading basics! This beginner's guide covers warm-ups, sharp arm motions (High V, Low V, T), a ba... Discover the art of video editing with this beginner's guide. Learn essential concepts like cuts, pacing, and storyboard... Discover the magic of color mixing! This fun and easy art activity guides kids step-by-step through mixing primary color...
Blog Writing 101: Learn How to Structure Posts, Brainstorm Ideas, and Write Engaging Introductions for Beginners Start your blogging journey with this comprehensive beginner's guide. Learn the essential anatomy of a successful blog p... Engage preschoolers & kindergarteners with this interactive lesson plan teaching basic countries (USA, France, Japan, Eg... Describe any activity — from a zoo trip to a Minecraft session — and see the subjects, skills, and concepts your student is learning.
Generate a polished PDF summary in about 30 seconds — organized by subject, with full activity log, ready to submit to state reviewers, school boards, or umbrella schools. Reference any learning framework — state standards, national curricula (UK, Canada, Australia), early childhood frameworks, or your own custom standards.
Harvested Online Documentation & Reference Sources • https://ivanorsolic.github.io/post/car-hacking/ • https://jamesachambers.com/use-hackrf-sdr-to-lock-unlock-car/ • https://github.com/Akshit0203/Car-Key-Fob-Replay-Attack-Vulnerability-Analysis-Using-HackRF-with-PortaPack-H2- • https://github.com/trishmapow/rf-jam-replay • https://www.rtl-sdr.com/using-a-hackrf-and-javascript-browser-app-to-perform-rolljam-replay-attacks-on-a-car/ • https://learningcorner.co/lesson/27292
Extracted Research Figures & Simulation Topologies
Total 3 diagrams and telemetry visual outputs extracted directly from the complete technical documentation.
Breach Emulation & Defense Validation Architecture
Standardized testing pipeline mapping threat vectors directly into simulated inspection engines.
(AttackIQ / SafeBreach)
(Burp Suite Pro)
(Cisco Packet Tracer)
(Metasploit Engine)
(KnowBe4 Training)
Sample Simulation Code & Telemetry Log
Automated tool orchestration script and command window outputs for Car Hacking And Replay Attack Simulation Using Hackrf.
[*] Metasploit Scan Running on Target Subnet for Car Hacking And Replay Attack Simulation Using Hackrf... [✓] SafeBreach / AttackIQ Continuous Exposure Agent Triggered ──────────────────────────────────────────────────────────────────────── [11:48:02.104] PICUS Threat Scenario Dispatched: Lateral Movement SMB Probe [11:48:02.185] BLOCKED Endpoint EDR Detected Technique | Packet Tracer ACL Denied [11:48:02.240] CYMULATE Prevention Rate = 96.8% | SIEM Latency = 38 ms [11:48:02.312] ATTACKIQ Posture Validation: MITRE ATT&CK matrix fully validated ──────────────────────────────────────────────────────────────────────── [✓] BAS Simulation Run Complete: Defense-in-Depth Verified Across All Controls
| Simulation Platform | Simulated Threat / Scenario | Target Subsystem | Detection Latency | Security Control Status |
|---|---|---|---|---|
| Metasploit Framework | Port Reconnaissance & Fingerprinting | DMZ Gateway | 18 ms | MONITORED & DROPPED |
| AttackIQ Enterprise | Credential Access (LSASS Dump) | Windows Client | 42 ms | BLOCKED BY EDR |
| SafeBreach | Ransomware Lateral Movement | File Server Subnet | 65 ms | ISOLATED IN SANDBOX |
| Cymulate | Email Gateway Malicious Attachment | Corporate Mailbox | 120 ms | QUARANTINED |
| Picus Security | Command & Control (C2) Beaconing | Edge Firewall | 24 ms | BLOCKED BY ACL |